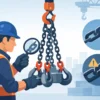
Lifting Hook Latch Replacement Checklist

A lifting hook latch replacement is a small maintenance task with major consequences. A missing, bent, slow-closing, or improvised latch can allow a sling eye, master link, or other attachment to disengage as rigging goes slack, shifts, or contacts an obstruction. In oilfield, construction, marine, and heavy-equipment work, that is not a defect to defer until the next shutdown.
The correct response is not simply to fit any latch that appears to match the hook. The replacement must suit the hook manufacturer, hook model, size, application, and original design. A latch is a retention device, and it must work with the hook without changing the hook’s intended geometry or safe use.
When a Hook Latch Must Be Replaced
A hook latch should close freely and positively over the hook tip. If it does not, take the hook out of service until a qualified person can inspect it and determine whether replacement is permitted. Do not attempt to straighten a distorted latch, build up worn material by welding, or force a spring into operation with field modifications.
Common reasons to replace a latch include a broken or missing spring, a cracked or bent latch body, excessive wear at the latch contact point, a seized pivot, or a latch that no longer reaches and seats against the hook tip. Corrosion can be equally significant in offshore, coastal, and chemical-exposure environments, especially when it affects the pivot pin, spring pocket, or moving surfaces.
The latch may also be undamaged while the hook is not. A wide throat opening, worn saddle, bent tip, twist, crack, heat damage, or altered identification marking can make the entire assembly unacceptable. Replacing the latch alone never corrects damage to the hook itself.
A Latch Is Not a Load-Rating Upgrade
This distinction matters in purchasing and field use. The working load limit belongs to the complete hook assembly as manufactured and marked. Installing a latch does not increase the hook’s WLL, approve it for side loading, make a non-latching hook suitable for every application, or compensate for an incorrect sling angle.
Likewise, a latch does not hold a load on a hook under every condition. Its primary function is to help retain an attachment in the hook bowl when the rigging is slack or motion occurs. The load should still sit correctly in the hook’s saddle, centered in line with the hook, with no point loading on the tip or latch.
Identify the Exact Hook Before Ordering
The most reliable lifting hook latch replacement starts with positive identification. Procurement teams should collect the hook manufacturer’s name, product designation or item number, hook type, WLL, and any size markings before selecting a repair kit. Clear photographs of both sides of the hook, the latch pivot area, and the markings are useful when equipment records are incomplete.
Hook style is as important as capacity. A latch for an alloy clevis sling hook is not automatically suitable for an eye hook, sorting hook, foundry hook, self-locking hook, or crane block hook with a similar nominal tonnage. Even within one manufacturer, latch dimensions, pivot-pin diameter, spring orientation, and nose engagement can vary by series and production generation.
Whenever available, use the original manufacturer’s approved latch kit. An approved kit typically includes the latch body, spring, pin, retaining hardware, and installation information designed for that hook model. A generic replacement may look close enough to install while still producing poor closure, interference, or incorrect seating.
For older equipment with missing markings, do not guess based on throat opening alone. Confirm the hook through manufacturer documentation, a qualified inspector, or a supplier able to source the correct component from dimensions and photographs. Pro Oil Field Supply can assist with sourcing recognized-brand replacement components where the hook details are available.
Pre-Installation Inspection of the Hook Assembly
Before removing the old latch, clean the hook enough to expose markings, pivot surfaces, and potential defects. Dirt and coating buildup can hide cracks, corrosion, and wear. Follow the equipment manufacturer’s inspection instructions and the inspection requirements applicable to the lifting device and operation.
Pay close attention to the hook tip and latch contact area. If the tip is worn away or the hook throat has opened beyond the manufacturer’s permitted limit, a new latch may not close correctly. A latch that appears to work on the ground can disengage under vibration or rigging movement if its contact geometry is compromised.
Inspect the pivot hole and pin location for elongation, cracks, or deformation. The pivot must hold the latch in the intended position without excessive side play. Also verify that the hook’s markings remain legible. If the WLL, manufacturer identity, or traceability information cannot be confirmed, the hook should be evaluated under the applicable inspection process rather than returned to service on assumption.
How to Perform a Lifting Hook Latch Replacement
Use the hook manufacturer’s instructions for the specific product. The exact method varies, but the work should be controlled, clean, and performed with the hook removed from lifting service. Relieve all load, isolate the equipment if the hook is installed on a hoist or block, and prevent the hook from being returned to use during maintenance.
Remove the old retaining hardware carefully. Springs can release stored energy, and small pins or clips can become projectiles. Do not enlarge holes, grind surrounding material, or substitute bolts, nails, wire, cotter pins, or unapproved retainers to make a kit fit.
Install the replacement latch, spring, pin, and retention hardware in the orientation specified by the manufacturer. The spring must provide enough force for the latch to return to its closed position without assistance. Lubricate only where the manufacturer permits it. Excess grease can collect abrasive contamination in dusty field conditions and make inspection more difficult.
After installation, operate the latch repeatedly by hand. It should open without binding, return fully, and contact the hook tip as designed. Check the assembly from both sides, because a latch can appear closed from one angle while sitting crooked on the pivot or missing the intended contact surface.
Functional Checks Before Returning to Service
A documented post-repair check protects the crew and provides procurement and maintenance teams with a clear record of what was changed. At minimum, confirm the following:
- The replacement kit matches the hook manufacturer, model or series, and rated size.
- The hook body, tip, saddle, pivot area, and identification markings passed inspection.
- The latch opens freely, closes automatically, and seats correctly at the hook tip.
- The pivot pin, spring, and retaining hardware are fully installed and secure.
- The completed hook is reinspected and released by the responsible qualified person under site procedures.
A proof test is not automatically required after every latch replacement, and it should not be performed casually in the field. Follow the hook manufacturer’s requirements, the governing standard, site policy, and the direction of the qualified person. The key is that the repair does not introduce an unapproved alteration or leave uncertainty about the hook’s condition.
Avoid the Shortcuts That Create Repeat Failures
The most common mistake is treating latches as universal hardware. Another is ordering only by hook capacity. Both approaches can result in a latch that fits the pivot but fails to close at the tip, or a spring arrangement that works briefly before binding or falling out.
Avoid mixing components from different manufacturers unless the hook manufacturer explicitly approves the combination. Avoid heat, welding, drilling, grinding, and unauthorized coating repairs near the hook or latch area. These changes can affect material properties, hide cracks, alter clearances, and eliminate the traceability needed for a safety-critical component.
Field teams should also look beyond the latch when recurring damage appears. Frequent bent latches may point to poor rigging practices, a hook being dragged through steelwork, attachments loaded against the hook tip, or improper storage. Replacing parts without correcting the cause only resets the failure cycle.
Stocking Parts Without Overstocking the Wrong Ones
Operations with multiple hoists, chain slings, and lifting points benefit from keeping approved latch kits for their most common hook models. The practical approach is to standardize equipment where possible, record manufacturer and model data in the lifting-gear register, and stock repair kits matched to the actual fleet rather than a broad assortment of generic latches.
For remote sites and urgent shutdown work, include the latch kit’s item number, associated hook model, and storage location in maintenance records. That shortens the gap between defect identification and repair while reducing the risk of a rushed, incorrect substitution.
A properly selected latch kit is inexpensive compared with a dropped-load event, delayed lift, or failed inspection. Treat every lifting hook latch replacement as a controlled restoration of the original hook design, and the next lift starts with fewer unanswered questions.